 Skip to the content

Safety is paramount when it comes to operating an All-Terrain Vehicle (ATV), and one of the most critical components affecting your safety is the braking system. The brake pads play a vital role in ensuring that your ATV can stop effectively and safely. Over time, these pads wear down due to friction and usage, which can compromise your ATV’s braking performance. Knowing when and how to replace the brake pads is essential for maintaining optimal safety while riding.
Recognizing the indicators of worn brake pads is crucial for timely replacement. Signs such as reduced braking efficiency, unusual noises during braking, or a warning light on your dashboard can signal that it’s time for a change. Regular inspections of your ATV’s brakes can help you catch wear before it impacts your safety. This article will guide you through the best practices for replacing brake pads and provide tips on when to make this important maintenance decision.
Investing time in understanding your ATV’s brake system helps enhance both your riding experience and safety on the trails. With proper knowledge and timely action, you can ensure that your ATV remains responsive and reliable, allowing you to enjoy every adventure with confidence.
Identifying Signs of Wear on ATV Brake Pads
Recognizing the signs of wear on ATV brake pads is essential for maintaining safety and performance. Regular inspection can prevent brake failure and enhance the riding experience. Here are key indicators to watch for:
1. Thickness of Brake Pads: One of the most straightforward ways to assess wear is by checking the thickness of the brake pads. New pads typically measure around 8 to 12 mm. If the pads are worn down to 3 mm or less, it’s time for a replacement.
2. Uneven Wear Patterns: Inspect the brake pads for uneven wear. If one pad is significantly thinner than the other, this could indicate issues with the caliper or the brake system, warranting further inspection and possible replacement.
3. Squeaking or Grinding Noises: Noticeable sounds when braking can signal that the pads have worn down. A squeaking noiseoften indicates that it’s time for new pads, while grinding sounds may mean the pads are completely worn out and could damage the rotor.
4. Reduced Braking Performance: A decline in braking effectiveness is a crucial warning sign. If the ATV takes longer to stop or requires more pressure on the brake lever, the pads may be reaching the end of their life.
5. Vibration or Pulsation: If you feel vibrations or pulsations through the brake lever when applying brakes, it might indicate worn pads or issues with the rotors. This condition can compromise braking efficiency and should be addressed immediately.
By paying attention to these signs of wear, ATV owners can ensure their brake pads remain effective and their rides remain safe. Regular maintenance not only enhances performance but also prolongs the lifespan of the braking system.
Step-by-Step Guide to Replacing ATV Brake Pads
Replacing the brake pads on your ATV is crucial for maintaining safe operation. Follow this detailed guide to ensure you perform the replacement correctly.
Step 1: Gather Necessary Tools and Materials
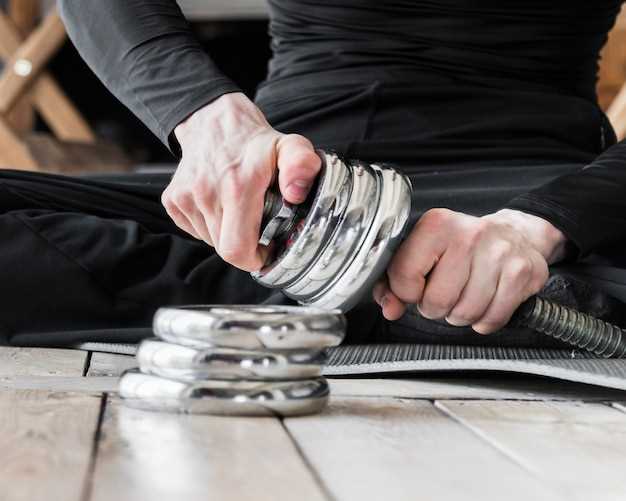
Before you start, collect all required tools: a socket set, a torque wrench, pliers, and a brake pad replacement kit suitable for your ATV model. Make sure you have a clean workspace to facilitate the process.
Step 2: Prepare the ATV
Park your ATV on a level surface and turn off the engine. Engage the parking brake and, if necessary, use wheel chocks to prevent any rolling. This ensures stability during the repair.
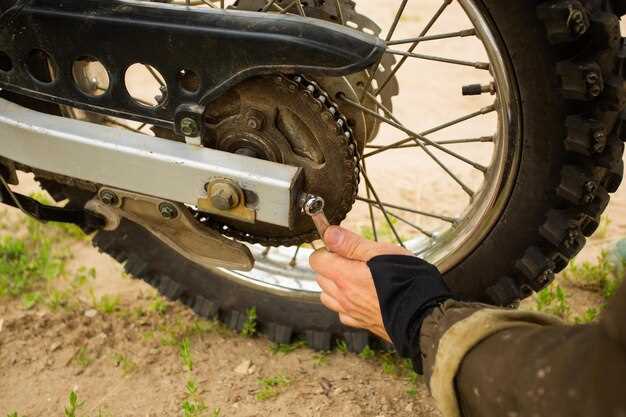
Step 3: Remove the Wheel
Using a socket wrench, loosen and remove the lug nuts from the wheel that you will be working on. Carefully take off the wheel and set it aside to access the brake assembly.
Step 4: Access the Brake Caliper
Locate the brake caliper mounted over the rotor. Remove the bolts securing the caliper using a socket wrench. Slide the caliper off the rotor, being careful not to damage any hydraulic lines.
Step 5: Remove Old Brake Pads
Identify how the brake pads are secured within the caliper. Remove any clips or pins holding them in place. Gently slide out the old brake pads. Take note of their orientation for the installation of new pads.
Step 6: Install New Brake Pads
Take your new brake pads and insert them into the caliper, ensuring they are placed in the same position as the old ones. Secure them with the clips or pins that were previously removed.
Step 7: Reattach the Brake Caliper
Carefully slide the caliper back onto the rotor and align it properly. Reinstall the caliper bolts and tighten them to the manufacturer’s recommended torque specifications using a torque wrench.
Step 8: Reattach the Wheel
Place the wheel back onto the axle and hand-tighten the lug nuts. Lower the ATV to the ground and then fully tighten the lug nuts in a crisscross pattern to ensure even pressure.
Step 9: Test the Brakes
Before taking your ATV for a ride, pump the brake lever several times to position the brake pads against the rotor. This step is crucial for proper brake function. Check for any unusual noises or leaks.
Step 10: Dispose of Old Brake Pads
Dispose of the old brake pads according to local regulations. Do not throw them in regular trash as they may contain materials harmful to the environment.
Following these steps will help you efficiently replace the brake pads on your ATV, ensuring it remains safe and reliable on trails and in the field.
Choosing the Right Brake Pads for Your ATV Model
Selecting the appropriate brake pads for your ATV is crucial for optimal performance and safety. Different models require specific brake pads tailored to their braking system and usage conditions. Begin by consulting your ATV’s owner manual, which typically provides information on the recommended brake pad types suited for your model.
Consider the material of the brake pads. Organic pads offer good performance for casual riders but wear out quickly under intense use. Semi-metallic pads provide a balance between durability and performance, making them suitable for various riding conditions. Ceramic pads excel in heat dissipation and longevity, ideal for high-performance ATVs. When choosing, factor in how and where you ride, as this will influence your selection.
Quality should never be compromised. Always opt for brake pads from reputable manufacturers known for their reliability and performance. Investing in high-quality pads not only enhances braking efficiency but also extends the life of your brakes and prevents costly repairs in the long run.
Lastly, remember to check the compatibility of the brake pads with your specific ATV model. Some pads may fit multiple models, while others are exclusive to particular brands. Ensuring compatibility helps maintain effective braking performance and safety on trails or tracks.