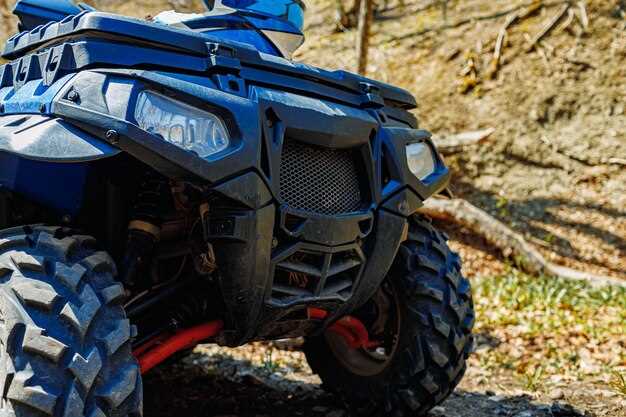
The performance of your All-Terrain Vehicle (ATV) heavily relies on its drive system, and one of the most critical components in this system is the drive belt. Over time, drive belts endure significant wear and tear due to constant friction and exposure to varying environmental conditions. Ignoring a worn-out belt can result in decreased performance, impacting acceleration and overall handling.
Timely replacement of a worn-out drive belt is essential for maintaining peak performance. Recognizing the signs of wear is crucial, as a damaged belt can lead to more severe issues like engine failure or other mechanical problems. Knowing when and how to replace the belt not only extends the life of your ATV but also ensures a smooth and efficient ride.
In this guide, we will walk you through the steps for replacing your ATV’s drive belt, providing you with the knowledge needed to tackle this essential maintenance task with confidence. Whether you’re an experienced rider or a beginner, understanding the process will empower you to keep your ATV performing at its best.
Identifying Signs of a Worn-Out Drive Belt in Your ATV

Recognizing the condition of your ATV’s drive belt is crucial for maintaining optimal performance. One of the first signs of a worn-out belt is a noticeable decrease in acceleration. If your ATV struggles to gain speed or feels sluggish during operation, it may be time for a replacement.
Another indication of belt wear is unusual noises during operation. Squealing, grinding, or slipping sounds often suggest that the drive belt is no longer functioning effectively. These noises arise from friction between worn components and can lead to further damage if not addressed promptly.
Visual inspection is also essential in identifying belt wear. Look for signs of fraying, cracking, or glazing on the belt surface. If you notice any of these defects, it’s a clear signal that you need to take action and fix the issue before it leads to more significant problems.
Finally, monitor the engagement of the drive system. If you experience delayed or erratic engagement when accelerating, this can also point to a worn-out drive belt. Addressing these symptoms early on can save you time and money by preventing more extensive repairs down the line. Regular checks and prompt replacements are key to keeping your ATV in top condition.
Step-by-Step Guide to Removing the Old Drive Belt

Before replacing the worn-out drive belt, it is essential to properly remove the old one to ensure the best performance of your ATV. Follow these steps to facilitate a smooth replacement process:
1. Preparation: Start by ensuring that your ATV is parked on a flat, stable surface. Turn off the engine and allow it to cool completely. Disconnect the battery to prevent any accidental electrical issues while working.
2. Access the Drive Belt: Depending on your ATV model, you may need to remove the side panel or covers to access the drive belt. Use the appropriate tools to unscrew and detach these parts carefully.
3. Inspect the Setup: Before removing the belt, take a moment to inspect the drive system for any other signs of wear or damage. This will help you identify if any additional parts need replacement during the process.
4. Loosen Tension: Locate the tension mechanism of your drive belt. Many ATVs have a tensioner that can be released to relieve pressure on the belt. Follow the manufacturer’s instructions to loosen it completely.
5. Remove the Belt: Once the tension is released, gently slide the belt off the drive pulleys. If the belt is particularly stuck due to wear or debris, you can use a pry tool carefully to assist in its removal. Be cautious not to damage any surrounding components in the process.
6. Final Check: After the drive belt is removed, inspect the pulleys and surrounding areas for any debris or damage. Clean the surface where the new belt will be installed to ensure optimal performance and longevity.
Following these steps will help you successfully remove the old drive belt, setting the stage for an effective replacement that will enhance your ATV’s performance.
Tips for Installing the New Drive Belt and Enhancing Performance
When installing a new drive belt for your ATV, ensure you start with a clean workspace. Remove any dirt or debris from the drive system to avoid contamination or blockage. A clean environment helps maintain the performance of the belt.
Before installing the new belt, inspect the pulleys for any wear or damage. If the pulleys are worn, they can negatively impact the belt’s performance and lifespan. Fixing or replacing worn pulleys before installation ensures optimal contact and efficiency.
While putting on the new belt, make sure it is properly aligned within the pulleys. Misalignment can lead to premature wear and belt slippage. Follow the manufacturer’s specifications for correct positioning to guarantee effective operation and performance enhancement.
It’s essential to adjust the belt tension according to the guidelines provided. Proper tension not only aids in the belt’s function but also enhances overall ATV performance. An overly tight or loose belt can result in inefficient power transfer.
After installation, run your ATV at varying speeds to ensure the new drive belt is functioning correctly. Listen for any unusual noises or vibrations, as these can indicate faults in the setup. A smooth operation is a sign of good performance and proper installation.
Finally, keep the drive system well-maintained by regularly checking the belt and pulleys for signs of wear. Implementing a proactive maintenance routine can significantly extend the lifespan of your new belt and optimize the performance of your ATV.
 Skip to the content