 Skip to the content

Maintaining the integrity of your ATV’s fuel system is crucial for both performance and safety. A leak in the fuel line can lead to dangerous situations, affecting not only the engine’s efficiency but also posing serious fire hazards. Understanding how to identify and repair these leaks can make a significant difference in prolonging the lifespan of your vehicle.
When you notice signs of a fuel leak, such as a smell of gasoline or wet spots along the line, it’s essential to address the issue promptly. Ignoring even a small leak can lead to greater problems down the line, including reduced performance and increased repair costs. This guide will walk you through the steps necessary to repair a leaking fuel line, ensuring that your ATV remains in optimal condition while keeping safety as a top priority.
In this article, we will cover the tools required, the inspection process for your fuel system, and the straightforward techniques for an effective repair. With the right approach, repairing a leaking ATV fuel line can be accomplished easily and safely, allowing you to get back on the trails with confidence.
Identifying the Source of a Fuel Leak in Your ATV
When dealing with a fuel leak in your ATV, the first step is to identify its source. Start by inspecting the entire fuel system, including the fuel lines, connections, and fuel tank. Look for any visible signs of damage, such as cracks or holes in the fuel line, which may indicate the location of the leak.
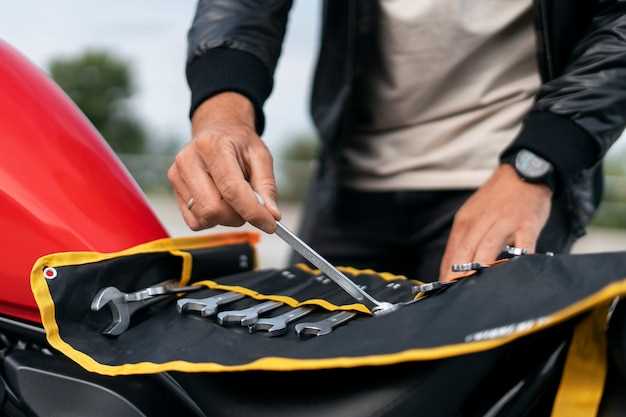
Check the Fuel Lines: Carefully examine all fuel lines for wear and tear. A visual inspection should reveal any obvious issues. Pay special attention to areas where lines may rub against other components or where they connect to the fuel tank and carburetor.
Inspect the Fuel Connections: Loose or degraded connections can also lead to leaks. Tighten any loose clamps and replace any damaged fittings. Ensure that all seals are intact to prevent fuel from escaping.
Examine the Fuel Tank: The fuel tank is another critical area to inspect. Look for any signs of corrosion or damage, especially around the seams. If the tank is compromised, it may need to be replaced, as repairs could be insufficient for long-term use.
Look Underneath: When searching for leaks, don’t forget to check underneath the ATV. Fuel may trickle down from the source and accumulate in areas that are not immediately visible. Use a flashlight to help illuminate dark spots during your inspection.
Test for Leaks: If you suspect a leak but cannot find the source visually, you can conduct a simple test. With your ATV turned off, carefully run the engine and observe if any fuel accumulates under the vehicle. Be cautious during this process, ensuring safety precautions are followed.
Identifying the source of a fuel leak promptly will help prevent further damage to your ATV and ensure safe operation. If a leak is detected, address it immediately to maintain the integrity of the fuel system.
Step-by-Step Guide to Repairing a Damaged Fuel Line
Repairing a damaged fuel line is essential for maintaining the efficiency of your ATV’s fuel system and preventing dangerous leaks. Follow this step-by-step guide to ensure a safe and effective repair.
First, ensure your ATV is on a level surface and the engine is completely cooled. Disconnect the battery to eliminate any risk of sparks while working with the fuel system. Locate the damaged fuel line, which may be indicated by signs of leakage or visible wear.
Next, carefully assess the extent of the damage. If the leak is small, you might be able to use a quick fix, such as heat-resistant tape. For more serious damage, you will need to replace the entire section of the fuel line. To do this, locate the clamps securing the line to the fuel injectors or tank, and use a screwdriver or pliers to loosen them.
Once the clamps are removed, gently pull the damaged fuel line off its connectors. Take this opportunity to inspect the connectors for any signs of wear or corrosion. If they are damaged, replace them as well.
Cut a new section of fuel line to match the length of the removed damaged segment, ensuring it is made from compatible material. Attach one end of the new fuel line to the fuel injector or tank, securing it with a clamp. Repeat the process for the opposite end, ensuring a snug and leak-free fit.
After securing the new line, double-check all connections and clamps to ensure everything is properly tightened. Reconnect the battery and start the ATV’s engine. Allow it to run for a few minutes while monitoring the newly installed fuel line for any signs of leaks.
If everything appears secure and there are no leaks, the repair is complete. Regularly inspect your fuel system to prevent future issues and ensure the longevity of your ATV’s performance.
Safety Precautions to Take During ATV Fuel System Repairs
When repairing a leaking ATV fuel line, it is crucial to prioritize safety to prevent accidents and ensure a successful repair. Start by working in a well-ventilated area to avoid inhaling any harmful fumes that may escape from the fuel system. This step is essential to protect your respiratory health and minimize the risk of fire hazards.
Before beginning any repairs, make sure to disconnect the battery to eliminate any electrical sparks that could ignite fuel vapors. Always wear appropriate personal protective equipment, including gloves and safety goggles, to shield your skin and eyes from potential splashes of fuel.
To further enhance safety, have a fire extinguisher readily available in case of emergencies. Keep all flammable materials away from your workspace and avoid smoking or using open flames while performing repairs.
Additionally, use absorbent materials to capture any spills that may occur during the disconnection and reconnection of the fuel line. Always inspect the ATV for any electrical issues or faulty components in the fuel system before making repairs, as these could lead to dangerous situations if not addressed.
Finally, once the repair is complete, check for any remaining leaks before starting the engine. This step ensures that the system is secure and reduces the likelihood of future issues, creating a safer riding experience overall.