 Skip to the content

Mountain biking is an exhilarating way to explore nature and challenge your riding skills. However, one common issue that riders face is a flat tire. Knowing how to quickly repair your tire can mean the difference between an enjoyable ride and a frustrating day on the trails. This guide will provide vital steps to effectively address a flat tire problem and keep you on your bike.
When you’re out on the trails, a flat tire can happen unexpectedly, whether you hit a sharp rock or a thorny bush. Having the right tools and understanding the quick repair techniques can save you time and energy. From basic patches to complete tire swaps, this article will cover essential tips and tricks to resolve your tire issues, ensuring you’re ready to continue your adventure.
Many riders might think that fixing a flat is only necessary for road bikes, but it’s just as crucial for ATV and mountain bikes. Equipped with knowledge and practice, you can tackle tire repairs confidently, minimizing downtime and getting back to enjoying the trails. Let’s dive into the step-by-step process of fixing a flat tire while mountain biking.
Choosing the Right Tools for Tire Repair on the Trail
When mountain biking, the ability to repair a flat tire efficiently can make a significant difference in your ride. Selecting the appropriate tools for tire repair is crucial for ensuring you can quickly fix any issues at hand.
First and foremost, a reliable tire patch kit is essential. Choose a kit that includes various patches, adhesive, and surface preparation tools. This ensures you can address punctures of different sizes and types encountered on the trail.
A good set of tire levers is also vital. These tools help you easily remove the tire from the rim without causing damage, especially important when the tire is tough or has been seated firmly. Look for levers that are lightweight yet durable, as they will be more convenient to carry.
Another must-have tool is a portable pump or CO2 inflator. Maintaining proper tire pressure is essential for optimal performance and safety while riding. A compact pump allows for easy inflation, while a CO2 inflator can provide quick air boosts in a matter of seconds.
Additionally, consider including a multi-tool that features a variety of functions such as a screwdriver, wrenches, and even a chain tool. This can be particularly useful if you encounter other mechanical issues or need to adjust components of your bike during your ride.
Finally, ensure that you have a clean cloth or rag on hand to wipe away any dirt or debris from the tire or wheel area during the repair process. Keeping everything clean helps you avoid further complications while fixing your flat tire.
In summary, equipping yourself with the right tools–like a tire patch kit, levers, pump, multi-tool, and a clean cloth–can make tire repair on the trail efficient and hassle-free. Whether you’re riding an ATV or a mountain bike, being prepared will help you get back on track quickly.
Step-by-Step Guide to Patch a Mountain Bike Tire
When you experience a flat tire while mountain biking, having the right tools and knowing how to perform a repair can save your ride. Follow these steps to effectively patch your tire.
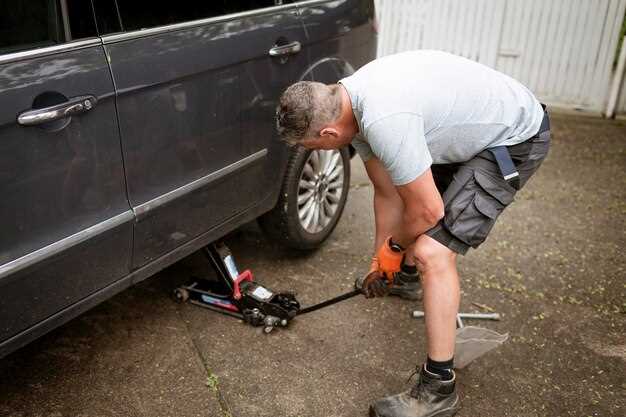
First, remove the wheel from your bike. Depending on your mountain bike model, you might need a wrench or a simple quick-release lever. Ensure the bike is securely positioned to avoid any accidents during this process.
Next, carefully take off the tire from the rim. Using tire levers, gently pry the tire bead away from the rim, starting at one point and working your way around. Be cautious to avoid damaging the inner tube.
Once the tire is off, locate the puncture. Inflate the inner tube slightly to help identify any air leaks, which may appear as a hissing sound or small bubbles if submerged in water. Mark the puncture with a chalk or marker for easy reference.
Before applying a patch, clean the damaged area. Use sandpaper included in your repair kit to roughen the surface around the puncture. This step is crucial for ensuring that the adhesive bonds effectively.
Apply a thin layer of tire glue generously over the puncture site and let it sit for a minute as per the instructions on your repair kit. Once it gets tacky, take a patch and firmly press it over the glue. Make sure there are no air bubbles trapped underneath.
Allow the patch to cure according to the manufacturer’s recommendations. This usually takes several minutes for a secure bond. While waiting, you can inspect and clean the tire for any debris or sharp objects that may have caused the flat.
After the patch has set, reinstall the inner tube back into the tire. Ensure that it sits evenly within the casing. Begin placing the tire back onto the rim, making sure not to pinch the tube in the process. Work your way around the rim until the tire is fully seated.
Inflate the tire to the recommended pressure, which can usually be found on the tire’s sidewall. Finally, reattach the wheel to your bike. Check the repair by gently squeezing the tire to feel for any leaks, ensuring that your fix is solid before heading back out on the trail.
With these steps, you can efficiently repair your mountain bike tire, allowing you to continue your adventure without significant delays.
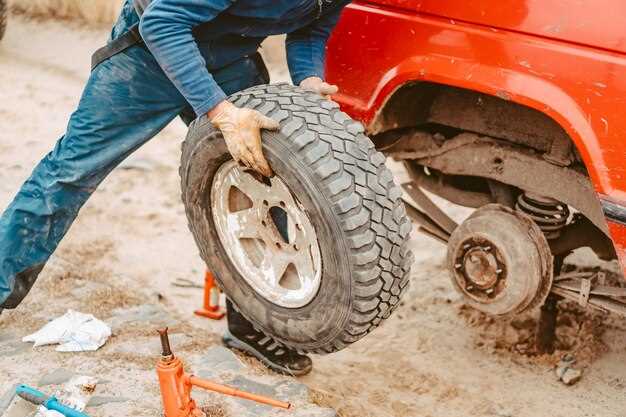
Temporary Solutions for ATV Tires in Emergency Situations
In the event of a flat tire while off-roading with your ATV, quick and effective repair methods can ensure your ride continues without significant delays. Knowing how to fix a flat tire temporarily is essential for any ATV enthusiast.
One straightforward option is to use a tire sealant. These products are designed to quickly fill punctures and leaks. Simply inject the sealant into the tire through the valve stem, and then rotate the tire to allow the sealant to spread evenly. This method works best for small punctures, typically up to a quarter of an inch in diameter.
If the puncture is larger or the sealant isn’t an option, consider using a tire plug kit. These kits include rubber plugs and insertion tools specifically designed to repair tires swiftly. Locate the puncture, insert the plug using the tool, and pull it out slightly to allow it to expand within the tire, sealing the hole effectively. This quick fix can get you back on the trails in no time.
Another temporary solution involves using a spare tire if you have one onboard. Swapping out the damaged tire for a spare allows you to continue your ride while you evaluate the situation and plan for a more permanent repair later.
Remember that these temporary fixes are not meant to be long-term solutions. Check the repaired tire regularly and seek a professional fix as soon as possible to avoid further complications while riding your ATV.